[hgallery3 id=”8279″ height=”320″ width=”200″]
|
||||
|
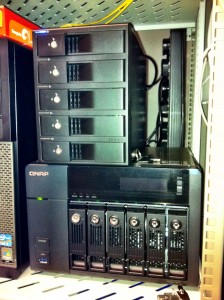
The max capacity of the QNAP is 8TB and is backup by a single 3TB disk placed in a Century external RAID box. The Century external RAID box can house a max of five 3TB disk with a max. of 12TB in a RAID5 configuration. Enough to backup the whole QNAP when the data is fully populated.
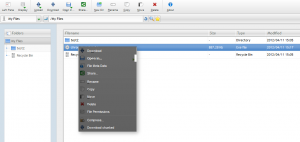
During the testing, I found that the QNAP cannot backup the sub-folder permissions to an external drive. Luckily in the QNAP community, I found that I can run a simple script in a cront job to do the export of the acls into a file and re-import from it after a data recovery. The command to export the acls is (getfacl -R * > acl.txt) and the command to import is (setfacl –restore=acl.txt). Just wonder if I can do the same the synology NAS. After the deployment of the QNAP, I was aroused on research the ways of deploying storage through using Dell PowerEdge R510 and VMWare and various NAS based distribution like freenas8 and openfiler. Since I am quite proficient in the Linux and samba deployment and configuration, these NAS based distribution is rather limited when compared to the QNAP and provide no advantages to me (except the zfs file system provided by freenas). One further stuff I will look into is to setup a sample samba vm with advanced windows based acl enabled. This will mimic part of the smb sharing functions of QNAP provided but without the fancy web file manager.
The ajaxplorer support LDAP authentication, see my sample configuration here which allow login from local or Openldap authentications. This was proved to be a very difficult task since a lot of tools were required to be re-compiled for the custom built python. I documented the sequence of tools required to be re-built below : 1. Compile python 2.7.2 with shared library enabled../configure --prefix=/opt/local --enable-shared 2. Setup environment variablesedit ~/.bashrc export PATH=/opt/local/bin:$PATH export LD_LIBRARY_PATH=/opt/local/lib:$LD_LIBRARY_PATH export PYTHONPATH=/opt/local/lib/python2.7/site-packages:$PYTHONPATH 3. Compile LAPACK(make sure fortran compiler is installed) wget http://www.netlib.org/lapack/lapack.tgz tar xzvf lapack.tgz cp -vf make.inc.example make.inc vi make.inc # OPTS = -O2 -fPIC -m64 # NOOPT = -O0 -fPIC -m64 #the -m64 flags build 64-bit code (nothing for 32bit) cd ~/src/lapack-3.4.0/SRC make lib cp libtmglib.a /opt/local/lib cp liblapack.a /opt/local/lib 4. Compile ATLASwget http://sourceforge.net/projects/math-atlas/files/Stable/3.8.2/atlas3.8.2.tar.gz tar zxvf atlas3.8.2.tar.gz mkdir ATLAS_BUILD cd ATLAS_BUILD /usr/bin/cpufreq-selector -g performance (turn off CPU Throttling for CentOS) /root/src/ATLAS/configure -Fa alg -fPIC --prefix=/opt/local \ --with-netlib-lapack=/opt/local/lib/liblapack.a make make check make ptcheck make time make install cd lib make shared make ptshared cp -vf *.so *.a /opt/local/lib 5. numpywget http://voxel.dl.sourceforge.net/sourceforge/numpy/numpy-1.6.1.tar.gz tar xzvf numpy-1.6.1.tar.gz cd ~/src/numpy-1.6.1 rm -rvf build cp -vf site.cfg.example site.cfg vi site.cfg [DEFAULT] library_dirs = /opt/local/lib include_dirs = /opt/local/include [blas_opt] libraries = ptf77blas, ptcblas, atlas [lapack_opt] libraries = lapack, ptf77blas, ptcblas, atlas python setup.py build --fcompiler=gnu95 python setup.py install --prefix=/opt/local # verify install (cd ~/ && python -c "import numpy; \ assert numpy.dot.__module__ == 'numpy.core._dotblas'; \ from numpy.linalg import lapack_lite") 6. scipywget http://voxel.dl.sourceforge.net/sourceforge/scipy/scipy-0.10.1.tar.gz tar xzvf scipy-0.10.1.tar.gz rm -rvf build python setup.py build python setup.py install --prefix=/opt/local # verify install (cd ~/ && python -c "from scipy import linalg") 7. boost library (we need boost library 1.42 as required by graph tool later)get boost 1.42 from http://www.boost.org/users/history/version_1_42_0.html edit bootstrap.sh PREFIX=/opt/local EPREFIX= LIBDIR=/opt/local/lib INCLUDEDIR= LIBS="" PYTHON=/opt/local/bin/python ./bootstrap.sh ./bjam ./bjam install --prefix=/opt/local (move/remove the system boost header in /usr/include to make sure the later package will find and use the updated boost header and libraries) 8. CGALget CGAL from here cmake . -DCMAKE_INSTALL_PREFIX=/opt/local -DBUILD_SHARED_LIBS=TRUE \ -DCGAL_CXX_FLAGS=-I/opt/local/include \ -DCGAL_SHARED_LINKER_FLAGS=-L/opt/local/lib make make install 9. graph-tool (require gcc 4.2 or above and boost 1.42 or above)get graph-tool from here export CFLAGS=-I/opt/local/include export CPPFLAGS=-I/opt/local/include export CXXFLAGS=-I/opt/local/include export LDFLAGS=-L/opt/local/lib export CC=gcc44 (centos 5 only) export CXX=g++44 (centos 5 only) ./configure --prefix=/opt/local --with-boost=/opt/local make (this require around 100min. for Core 2 Quad Q9400 2.66hz 4GB RAM computer) make install 10. Compile a custom swig for graphviz-python, otherwise the compile of graphviz will fail laterget swig source from http://www.swig.org/download.html export CFLAGS=-I/opt/local/include export CPPFLAGS=-I/opt/local/include export CXXFLAGS=-I/opt/local/include export LDFLAGS=-L/opt/local/lib ./configure --prefix=/opt/local make make install 11. Compile graphviz to get the graphviz-python (gv) module for our custom built python. It is needed by graph-toolget graphviz source from http://www.graphviz.org/Download_source.php export CFLAGS=-I/opt/local/include export CPPFLAGS=-I/opt/local/include export CXXFLAGS=-I/opt/local/include export LDFLAGS=-L/opt/local/lib ./configure --prefix=/opt/local --enable-shared --enable-python=yes --enable-php=no \ --enable-tcl=no --enable-perl=no make make install 12. python-igraphwget http://switch.dl.sourceforge.net/sourceforge/igraph/igraph-0.5.4.tar.gz wget http://pypi.python.org/packages/source/p/python-igraph/python-igraph-0.5.4.tar.gz tar xzf python-igraph-0.5.4.tar.gz tar xzf igraph-0.5.4.tar.gz cd igraph-0.5.4 export CPPFLAGS=-I/opt/local/include export CXXFLAGS=-I/opt/local/include export LDFLAGS=-L/opt/local/lib ./configure --prefix=/opt/local make make install cd python-igraph-0.5.4 python setup.py install 13. Compile pycairo [optional for some function of python-igraph]make sure cairo and cairo-devel packages are installed get pycairo-1.2.2.tar.gz from http://cairographics.org/releases/ (Pls note that if you get a newer version of pycairo which require a newer rversion of cairo library, you may need to recompile the cairo library from source) ./configure --prefix=/opt/local make make install 14. fix graph-tool cannot find gvc library when it’s installed in a non-standard locationedit /opt/local/lib/python2.7/site-packages/graph_tool /draw/__init__.py
#libname = ctypes.util.find_library("gvc")
#if libname is None:
# raise OSError()
libgv = ctypes.CDLL("libgvc.so")
# libgv = ctypes.CDLL(libname)
Reference : https://projects.skewed.de/graph-tool/ticket/100 16. Compile matplotlibGet the source from http://matplotlib.sourceforge.net/ python setup.py build python setup.py install 17. test code#!/opt/local/bin/python from igraph import * g = Graph.Kautz(m=3, n=2) adj = g.get_adjacency() fig = Plot(bbox=(480, 480)) fig.add(g, layout="fr", vertex_label=None) fig.add(adj, bbox=(360, 0, 480, 120), grid_width=0, opacity=0.7) fig.show() create the file /etc/yum.repos.d/vmware.repoand we place this text in it: [vmware-tools] name=VMware Tools for Red Hat Enterprise Linux $releasever – $basearch baseurl=http://packages.vmware.com/tools/esx/latest/rhel6/$basearch enabled=1 gpgcheck=1 gpgkey=http://packages.vmware.com/tools/VMWARE-PACKAGING-GPG-KEY.pub If we installed previously VMware tools via the local vSphere, we will need to remove them using /usr/bin/vmware/vmware-uninstall-tools.pl We can now install VMware tools via yum: yum install vmware-tools-esx-nox In the first run, we will be asked to import the public key, and we have to answer y After the install, it can happen the installer does not configure the daemon for automatic start. If we execute: chkconfig --list and we do not see vmware-tools in the list, we need to configure the auto-start. First of all we check if the startup script is present: ll /etc/init.d/vmware-tools If the script is there, we add it to the autostart list using these two commands, one after the other: chkconfig --add vmware-tools chkconfig vmware-tools on We can finally start the daemon: /etc/init.d/vmware-tools start See the explanation here : The default highlighting mechanism for collapsed threads that contain an unread message is to underline it. However, I found that this visual clue is not enough The below code in userChrome.css can make the collapsed threads with unread message both highlighted and in read color /* change unread thread color */ |
||||


