Travel

Categories

Ubuntu – vlan & bridge configuration

1. Install VLAN package on your computer:

sudo apt-get install vlan

2. Edit your /etc/network/interfaces file so it would contain the following:

# The loopback network interface
auto lo
iface lo inet loopback

# This is a list of hotpluggable network interfaces.
# They will be activated automatically by the hotplug subsystem.
auto vlan4
auto vlan5

# VLAN 4
iface vlan4 inet static
address 192.168.0.8
netmask 255.255.255.192
network 192.168.0.0
broadcast 192.168.0.63
mtu 1500
vlan_raw_device eth0

# VLAN 5
iface vlan5 inet manual
up ifconfig $IFACE 0.0.0.0 up
mtu 1500
vlan_raw_device eth0

Note: You have to replace my IP addresses, network masks and gateway IP address with your own.

3. Make sure that switch interface you are connected to configured with respective VLANs.

4. Restart your network interface:
sudo /etc/init.d/networking restart

You should see something like:
Set name-type for VLAN subsystem. Should be visible in /proc/net/vlan/config
Added VLAN with VID == 4 to IF -:eth0:-
Set name-type for VLAN subsystem. Should be visible in /proc/net/vlan/config
Added VLAN with VID == 5 to IF -:eth0:-

See more examples in /usr/share/doc/ifupdown/examples/network-interfaces.gz

Bridge setup :
1. apt-get install bridge-utils
2. Edit your /etc/network/interfaces file so it would contain the following:

[ a bridge with an associated IP address ]
iface br0 inet static
bridge-ports eth0 eth1
address 192.168.1.1
netmask 255.255.255.0
[ a bridge which acts as an anonymous bridge ]
iface br0 inet manual
bridge-ports eth0 eth1
up ifconfig $IFACE up

My Sample configuration for Ubuntu KVM networking config, the host vlan is vlan3, the vm guest vlan is vlan5

auto lo
iface lo inet loopback
auto vlan3
auto vlan4
auto br0

#vlan3
iface vlan3 inet static
address 137.189.xx.xx
netmask 255.255.255.0
gateway 137.189.xx.254
mtu 1500
vlan_raw_device eth0

#vlan4
iface vlan4 inet manual
up ifconfig $IFACE 0.0.0.0 up
vlan_raw_device eth0

#br0
iface br0 inet manual
bridge-ports vlan4
bridge_stp off
bridge_fd 0
bridge_macwait 0
up ifconfig $IFACE up

Canon DPP(Digital Photo Professional )教學

http://forum.canonfans.biz/viewthread.php?tid=45045

我個blog一歲喇

bc

Exploring XenServer 5.6 Free Edition

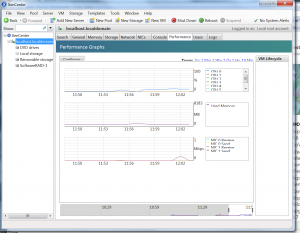
Citrix XenServer was starting to provide a Free edition from last year. The features of the free edition are comparable or more than what VMware ESXi provide. I decided to give it a try for its Latest XenServer v5.6 to see how well it will fit into my  requirement.

xencentre

1. The 1st thing I noticed is the broader hardware supported by XenServer. I install XenServer on an ordinary PC with Core i7 860 & ASUS P775D-E DELUX MB. It can detect the on board NIC (rt8196) without problem. Unlike VMware ESXI which only officially support Intel Pro1000 and Broadcom tg3 NICs, I believe XenServer can support most of the NICs which are supported by  linux natively.

2. Then 2nd thing I would like to do is to examine the possibility of using Linux software-raid on it as I cannot do this under VMware ESXi which support only hardware RAID controller. I found that this is quite easy to do which there’re a no. of docs in the net. Some of them even teach you how to make XenServer’s system files stored on linux software raid. Currently I only want to store VM images on a software RAID. A good document is available there : Software RAID on XenServer.

The steps in short :

a. create fd partition : /dev/sdb1, /dev/sdc1
b. mdadm --create --verbose /dev/md1 --level=1 --raid-devices=2 \
/dev/sdb1 /dev/sdc1
c. mdadm --detail --scan > /etc/mdadm.conf
d. xe sr-create content-type=user type=lvm shared=false \
device-config:device=/dev/md1 name-label=SoftwareRAID-1
e. Enter the following command to set your SR as the default SR on the system :
 xe pool-param-set default-SR=YOUR NEW SR UUID uuid=(press tab because you have a single pool)
f. Enter the following command to set your SR as the default location for suspended VM images:
xe pool-param-set suspend-image-SR= YOUR NEW SR UUID uuid=(press tab because you have a single pool)

[Note: MD is broken in XenServer 5.6. A workaround is available there : In short,  edit /etc/rc.d/rc.sysinit, remove the line ” [ -x /sbin/nash ] && echo “raidautorun /dev/md0″ | nash –quiet” and create /etc/mdadm.conf to start MD]

3. The 3rd thing to test is the migration of VMware Guest vm to Xen. This part is proofed the most difficult due to the different hardware emulation of the two platforms. Although Xen provide a software called XenConverter to do the job, this doesn’t make the job easier as it is just a format converter. The main problem is how to to retrofit the original VMware Guest hardware into the most basic one which Xen also support as well. This is a really daunting task and it seems those platform’s V2V converter doesn’t help much.

CoVirt 2.0 with KVM

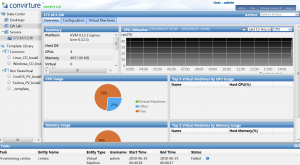
Tried this management tools with KVM. Though it is succesfully installed but it seems that it can’t work with the KVM with CentOS 5.5 very well. When I tried to do a Linux VM provision with it, it returned an error : (‘/etc/qemu-ifup: could not launch network script\n’, 1). There’s no such script in the CentOS 5.5 KVM. Moreover, it also cannot display the vm guest added using virt-manager. Anyway, the UI is not as robust as what VMware provided (vSphere client or the web UI provided by VMware server). It cannot be a replacement for what I am using…..
covirt1

Create a Bridge interface under CentOS/RHEL/Fedora

ifcfg-eth0 :

DEVICE=eth0
ETHTOOL_OPTS=”autoneg off speed 100 duplex full”
HWADDR=00:19:B9:1D:2A:AA
ONBOOT=yes
BRIDGE=br0

ifcfg-br0 :

DEVICE=br0
TYPE=Bridge
BOOTPROTO=dhcp
DELAY=0

Exploring KVM with CentOS 5.5

Since VMware have nearly abandoned VMware Server (Not all my servers can/will run VMware ESXi), I start to explore KVM with CentOS 5.5 and also migration tools from vmware based virtual machine image to kvm

http://www.cyberciti.biz/faq/centos-rhel-linux-kvm-virtulization-tutorial/

http://blog.mymediasystem.net/uncategorized/vmware-kvm-migration-guide/

http://sourceforge.net/projects/kvm/files/kvm-guest-drivers-windows/

After a day of testing, I found KVM on CentOS 5.5 is still not a vital alternative to VMware Server. First, it lack live snapshot which I consider vital when I need to backup a running Linux VM. Second, CentOS 5.5’s KVM lack SCSI emulation in the guest VM which made the direct migration of VMware guest to KVM nearly impossible. The support is added after kennel version 2.6.24 or later. KVM is presented as a serious alternative to VMware by RedHat. However, without the live snapshot and SCSI emulation, I don’t see this will happen….

Respect of free server virtualization solution, I will try Xen server 5.6 Free edition in the next few weeks, it is time to look at virtualization solution other than vmware ( I used vmware solution for over TEN years starting from GSX server 1.0).

Another site’s instruction of migrating VMware image to KVM

1. Make a backup of all the VMware Virtual Machine files in case you need to backout;

2.Remove VMware Tools;

3.Disable the screen saver;

4.Download mergeide.reg from: http://www.proxmox.com/cms_proxmox/cms/upload/misc/mergeide.reg

5.Install mergeide.reg;

6.Convert the original VMDK file to a growable VMDK file using the following as a template: (note: it is dash t space zero):
sudo vmware-vdiskmanager -r win2003.vmdk -t 0 win2003-grow.vmdk

7.Convert the growable VMDK image in to a QEMU file using the following as a template:
sudo qemu-img convert -f vmdk win2003-grow.vmdk -O qcow2 win2003.img

8.Follow the standard procedures to import QEMU image into Virtual Machine Manager or run from command line.

Prcoedure to change the disk type from SCSI to IDE on a vmware linux guest :

  • Step 1: Delete the Virtual SCSI disk and remove SCSI from the system – This may sound like a very drastic measure, but removing SCSI disk does not destroy the virtual disk images. This can be done by doing: Edit Virtual Machine Settings -> Select the SCSI disk -> Press the “Remove” button
  • Step 2: Edit the .vmx file and .vmdk file of the guest OS – For example, in my guest OS, Linux, it will have a Linux.vmx file. Inside this file would contain the following entries: scsi0.present = “TRUE” and scsi0.virtualDev = “lsilogic” Set the “TRUE” to “FALSE” and remove the scsi0.virtualDev line. After this, edit the Linux.vmdk file, and change: ddb.adapterType = “lsilogic” to ddb.adapterType = “ide”
  • Step 3: Add the modify virtual disk image – Goto Edit virtual machine settings again, this time use Add to add a new disk, and make sure we select Use an existing disk and browse the the modified Linux.vmdk that we had done in step 2.
  • Step 4: Make the guest OS boot from hda instead of sda – First, use the Slackware installer CD or ISO image to boot up. After boot up the system using the installer disk, mount the virtual disk partition to /mnt. From here, edit /etc/lilo.conf and /etc/fstab, make sure we change all the entry of sda to hda. Once this is done, run ‘lilo -r /mnt’. Create the hda* device file in /mnt/dev if required.

Canon DPP cannot display Chinese 中文 folder name after upgrade from 3.6 to 3.7 or later

I had suffered this problem for a while on my Windows 7 64 bits when I upgraded my Cannon DPP from 3.6 to 3.7 or later. Initially, I though this was a bug of 3.7. However, when I upgraded to 3.8 lately, the problem still exist. I started to explore to find a solution. I changed the system locale to Chinese (Taiwan) and rebooted but no success.

At last, I found the solution. In order to let the DPP 3.7 or later to display Chinese folder name successfully, I have to change the format to Chinese traditional (I let it set to English starting when I use Windows NT 4 [anyway, English NT4 can’t display Chinese without a 3rd party application for the time] many many years ago!!) in the Region & Language setting in the control panel. The system locale did not affect the DPP this time.

I have really stuck this for nearly a MONTH!! and need to use DPP on a Mac instead during the time!!

西歐十天 – 意大利

威尼斯 (Venice)

佛羅倫斯 (Florence)

羅 馬 – 梵蒂岡 (Rome- Vatican [Stato della Città del Vaticano])

西歐十天 – 奥地利

施華洛世奇水晶世界

茵斯布鲁克 InnBruck