Travel

Categories

Copy the content of harddisk to another under Windows

You can use MiniTool Partiont Wizard Home Edition

http://www.partitionwizard.com/free-partition-manager.html

unixtodos in Ubuntu

apt-get install tofrodos

Use the command todos & fromdos for the conversion

Configure esxi 4 vSwitch to jumbo frame

>esxcfg-vswitch -m 9000 vSwitch0

>excfg-vswitch -l

http://blog.scottlowe.org/2009/06/23/new-user-networking-config-guide/

Configure Snow Leopard to mount nfs using ports < 1024

Add the -o resvport as the mount option because Linux server will refuse NFS requests coming from a non-reserved (<1024) source port

VMware Server Tuning

http://peterkieser.com/technical/vmware-server-issues/

TCP/IP tuning

How To: Network / TCP / UDP Tuning
This is a very basic step by step description of how to improve the performance networking (TCP & UDP) on Linux 2.4+ for high-bandwidth applications. These settings are especially important for GigE links. Jump to Quick Step or All The Steps.
Assumptions
This howto assumes that the machine being tuned is involved in supporting high-bandwidth applications. Making these modifications on a machine that supports multiple users and/or multiple connections is not recommended – it may cause the machine to deny connections because of a lack of memory allocation.
The Steps

1. Make sure that you have root privleges.

2. Type: sysctl -p | grep mem
This will display your current buffer settings. Save These! You may want to roll-back these changes

3. Type: sysctl -w net.core.rmem_max=8388608
This sets the max OS receive buffer size for all types of connections.

4. Type: sysctl -w net.core.wmem_max=8388608
This sets the max OS send buffer size for all types of connections.

5. Type: sysctl -w net.core.rmem_default=65536
This sets the default OS receive buffer size for all types of connections.

6. Type: sysctl -w net.core.wmem_default=65536
This sets the default OS send buffer size for all types of connections.

7. Type: sysctl -w net.ipv4.tcp_mem=’8388608 8388608 8388608′
TCP Autotuning setting. “The tcp_mem variable defines how the TCP stack should behave when it comes to memory usage. … The first value specified in the tcp_mem variable tells the kernel the low threshold. Below this point, the TCP stack do not bother at all about putting any pressure on the memory usage by different TCP sockets. … The second value tells the kernel at which point to start pressuring memory usage down. … The final value tells the kernel how many memory pages it may use maximally. If this value is reached, TCP streams and packets start getting dropped until we reach a lower memory usage again. This value includes all TCP sockets currently in use.”

8. Type: sysctl -w net.ipv4.tcp_rmem=’4096 87380 8388608′
TCP Autotuning setting. “The first value tells the kernel the minimum receive buffer for each TCP connection, and this buffer is always allocated to a TCP socket, even under high pressure on the system. … The second value specified tells the kernel the default receive buffer allocated for each TCP socket. This value overrides the /proc/sys/net/core/rmem_default value used by other protocols. … The third and last value specified in this variable specifies the maximum receive buffer that can be allocated for a TCP socket.”

9. Type: sysctl -w net.ipv4.tcp_wmem=’4096 65536 8388608′
TCP Autotuning setting. “This variable takes 3 different values which holds information on how much TCP sendbuffer memory space each TCP socket has to use. Every TCP socket has this much buffer space to use before the buffer is filled up. Each of the three values are used under different conditions. … The first value in this variable tells the minimum TCP send buffer space available for a single TCP socket. … The second value in the variable tells us the default buffer space allowed for a single TCP socket to use. … The third value tells the kernel the maximum TCP send buffer space.”

10. Type:sysctl -w net.ipv4.route.flush=1
This will enusre that immediatly subsequent connections use these values.

Quick Step
Cut and paste the following into a linux shell with root privleges:

sysctl -w net.core.rmem_max=8388608
sysctl -w net.core.wmem_max=8388608
sysctl -w net.core.rmem_default=65536
sysctl -w net.core.wmem_default=65536
sysctl -w net.ipv4.tcp_rmem=’4096 87380 8388608′
sysctl -w net.ipv4.tcp_wmem=’4096 65536 8388608′
sysctl -w net.ipv4.tcp_mem=’8388608 8388608 8388608′
sysctl -w net.ipv4.route.flush=1

Another set of parameters suggested from VMWare Communities :
net.core.wmem_max = 16777216
net.core.rmem_max = 16777216
net.ipv4.tcp_timestamps = 0
net.ipv4.tcp_rmem = 4096 262144 16777216
net.ipv4.tcp_wmem = 4096 262144 16777216
net.core.optmem_max = 524288
net.core.netdev_max_backlog = 200000

Office’s Garden

Has setup a mini Office Garden using an equipment rack. Hope my plants can grow healthy in it la.
IMG_5818

socket options = IPTOS_LOWDELAY TCP_NODELAY SO_SNDBUF=8192 SO_RCVBUF=8192 in smb.conf

I have set this socket option as one of the performance tuning configuration on my production samba server long ago in the 100M/bit network era. Many later configured samba servers inherited this configuration naturally. However when I test the samba performance of my latest configured Dell PowerEdge Data server, the result is astonishing. Its throughput is only around~12 to 15 MB/s. Even a cheap latest NAS can have samba performance approach 80 to 90MB/s easily on a gigabit network. I noticed there should be something wrong in samba config on the Dell Server. After a quick search, I have found the read and write buffer setting of socket options in smb.conf :SO_SNDBUF=8192 SO_RCVBUF=8192 should be already obsoleted on Linux 2.6 kernel or later. After remove the send and write buffer setting in the socket options, the samba performance bumped to over 111MB/s at peak. I am quite surprised by the fact that the send and receive buffer settings can hinder the performance in that magnitude.

BTW, I think I can use this option to SLOW DOWN the samba throughput of modern server if the samba consumed too much resources.

VMware Server 2.0.2 on CentOS 5.5

Remember not to install the kvm kernel modules, otherwise you will get the error : failed to initialize monitor device when start a vm under VMware Server 2.0. BTW, you also need to follow instructions in this page to make VMware Server 2.0 work properly under CentOS 5.5. As a result, it seems that I can’t run the kvm based vms and vmware server vms side by side.

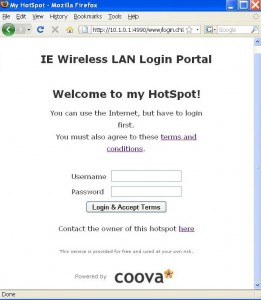
Upgrade chillispot 1.1.0 to coovachilli 1.2.3

I used chillispot as the wireless LAN captive portal for long time. It is one of the best FREE captive portal. Though it is quite simple and with less optimal performance, I used for our department’s Wireless LAN login. However, it is defunc now. The successor of it is coovachilli but the documentation of it is ….really NONE. Much of the config options need to be read from the src (conf/functions). Anyway I have tried it and at least found the my most needed features in it (Command to get user connection information and a good-looking miniportal Page). There’s no minportal sample in the stable source. I have to use SVN to get it.

coova-chilli

In short you should use SVN to get source, compile it with openssl enabled to enable https login page.

1. svn checkout http://dev.coova.org/svn/coova-chilli/
cd coova-chilli
sh bootstrap2
./configure --prefix=/path --with-openssl
make & make install

2. The options are not fully documented in the default config file, view the functions file to get a full list. Eg : the HS_UAMUISSL, HS_REDIRSSL, HS_SSLKEYFILE, HS_SSLCERTFILE & HS_MACPASSWD
3. Moreover the default encryption for the login page password is CHAP. I can’t find the location to configure this in the config file so I have to hardcore in the login page :

edit www/config-local.sh
change #hs_rad_proto=$(getconfig rad_proto) to
hs_rad_proto=pap